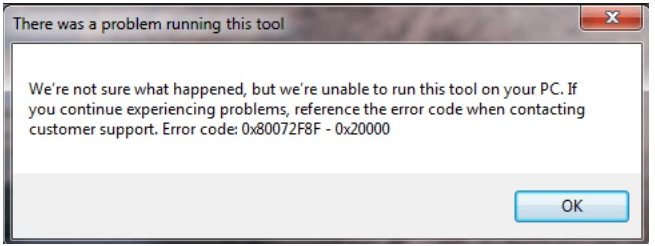
Error 0x80072F8F – 0x20000 stops a Windows upgrade before it starts. It appears in the Media Creation Tool, the Installation Assistant and the Update Assistant, usually with a message about the tool being unable to run or unable to reach Microsoft’s servers.
Despite how it looks, this is almost never a network fault. It is a TLS negotiation failure: the tool cannot open a secure connection to Microsoft, because the required protocol version is switched off, or because the system clock is wrong so certificates appear invalid.
Checked August 2026. This error is now most often hit while upgrading Windows 10 to Windows 11 — a common task since Windows 10 left support on 14 October 2025 and consumer Extended Security Updates end on 12 October 2027.
What the two codes mean
- 0x80072F8F —
WININET_E_SECURE_FAILURE. A secure connection could not be established. Bad clock, disabled TLS version, or an intercepting proxy. - 0x20000 — the phase that failed. Here it means the failure happened during the tool’s own setup, before any Windows files were touched.
Because nothing was installed, nothing needs undoing. Fix the connection problem and run the tool again.
1. Check the date, time and time zone
Start here. It takes ten seconds and it is the single most common cause.
TLS certificates are only valid between two dates. If the system clock is wrong by more than a little — a flat CMOS battery on an older desktop is the classic reason — every certificate looks expired or not yet valid, and the connection is refused.
- Press Win + I → Time & language → Date & time.
- Turn on Set time automatically and Set time zone automatically.
- Choose Sync now.
If the clock drifts again after every shutdown, replace the CR2032 battery on the motherboard — the upgrade error is a symptom, not the problem.
2. Run the tool as administrator
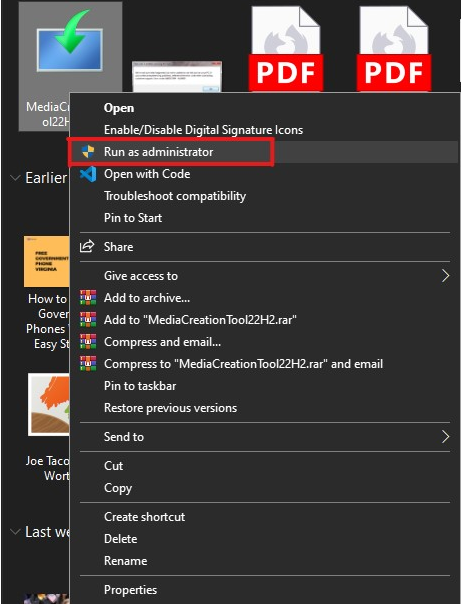
Being signed in as an administrator is not the same as running a program as one. Right-click the downloaded tool and choose Run as administrator. Without elevation it cannot write where it needs to, and the failure surfaces as a connection error.
3. Enable TLS 1.1 and 1.2 in Internet Options
This is the fix that resolves most cases. The setting is per-machine and is used by the upgrade tools, not just by browsers.
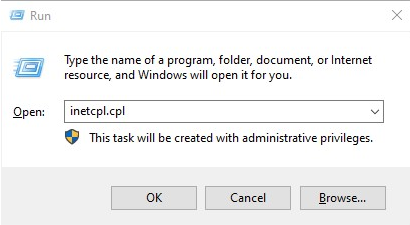
- Press Win + R, type
inetcpl.cpl, press Enter. - Go to the Advanced tab.
- Scroll to the Security section at the bottom.
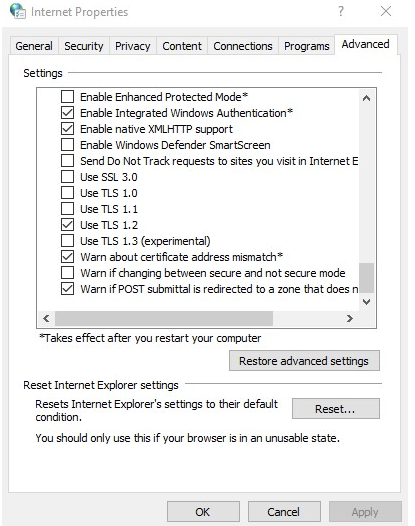
- Tick Use TLS 1.2, and Use TLS 1.3 if your version lists it.
- Untick Use SSL 3.0 and Use SSL 2.0 if present — they are obsolete and insecure.
- Select Apply, then OK, and restart the machine.
4. Enable TLS in the registry
Use this when the checkbox will not stay ticked, or when the machine is managed by policy.
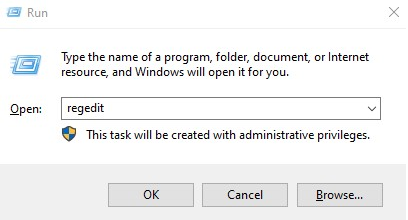
Registry edits are easy to get wrong and hard to undo from memory. Create a restore point first — see how to create a system restore point.
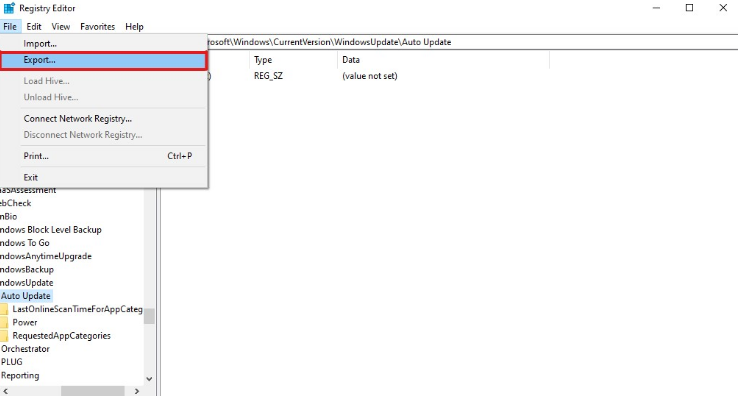
The reliable way is a single elevated PowerShell block rather than clicking through the editor:
$paths = @(
  'HKLM:\SOFTWARE\Microsoft\Windows\CurrentVersion\Internet Settings\WinHttp',
  'HKLM:\SOFTWARE\WOW6432Node\Microsoft\Windows\CurrentVersion\Internet Settings\WinHttp'
)
foreach ($p in $paths) {
  if (-not (Test-Path $p)) { New-Item -Path $p -Force | Out-Null }
  New-ItemProperty -Path $p -Name 'DefaultSecureProtocols' -Value 0xAA0 -PropertyType DWord -Force | Out-Null
}
0xAA0 enables TLS 1.0, 1.1 and 1.2 together. Restart afterwards — the value is read when the service starts, not when you set it.
5. Reset the Windows Update components
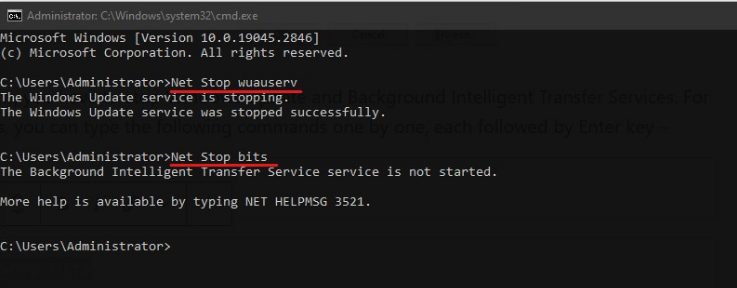
A corrupted update cache can produce the same failure. From an elevated Command Prompt:
net stop wuauserv
net stop cryptSvc
net stop bits
net stop msiserver

ren C:\Windows\SoftwareDistribution SoftwareDistribution.old
ren C:\Windows\System32\catroot2 catroot2.old

net start wuauserv
net start cryptSvc
net start bits
net start msiserver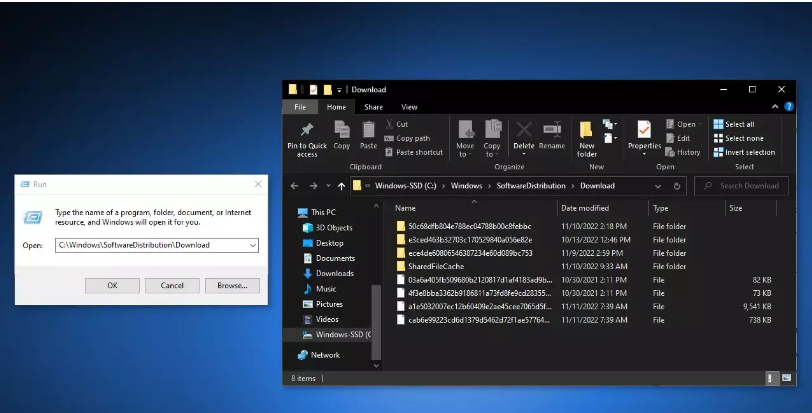
Start every service you stopped. Leaving wuauserv stopped leaves Windows Update silently dead. If you lose track, just reboot.
6. Check the services are actually running
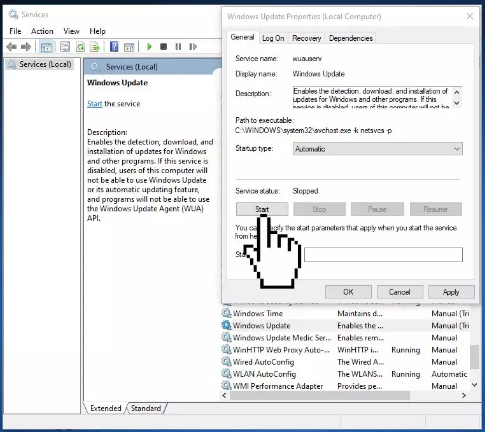
Press Win + R, run services.msc, and confirm these:
| Service | Startup type |
|---|---|
| Windows Update | Manual (Trigger Start) or Automatic |
| Background Intelligent Transfer Service | Manual |
| Cryptographic Services | Automatic |
| Windows Installer | Manual |
Anything set to Disabled needs changing — usually the work of a “debloating” script run at some point in the past.
7. Rule out the network path
Anything that inspects HTTPS traffic can break the negotiation:
- VPN clients — disconnect entirely, do not just pause.
- Corporate proxies and TLS-inspecting firewalls — on a work machine this is the most likely cause, and it needs IT to allow the endpoints.
- Third-party antivirus with HTTPS scanning — turn the web/HTTPS scanning module off temporarily.
- Custom DNS — some filtered resolvers block Microsoft update endpoints. Test with the network’s default DNS.
Then check the proxy settings Windows itself is using, from an elevated Command Prompt:
netsh winhttp show proxyIf a proxy is set that you do not recognise, clear it:
netsh winhttp reset proxy8. Confirm the machine can run Windows 11
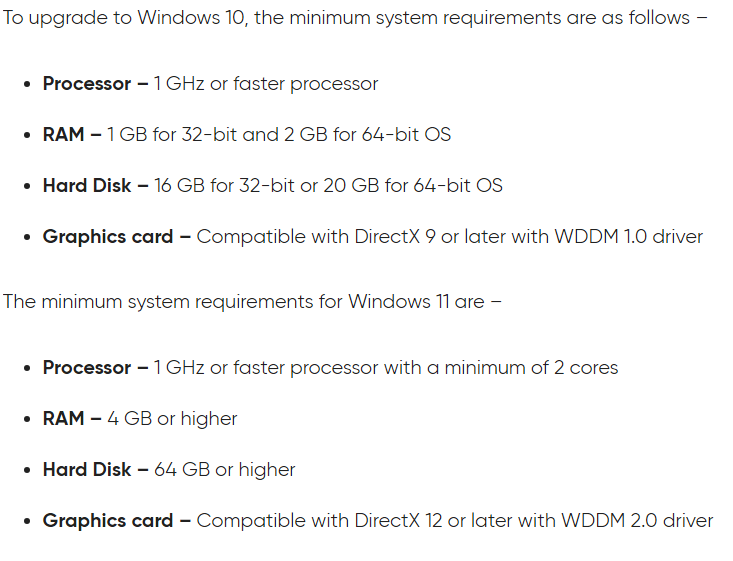
Windows 11 requires a 1 GHz dual-core 64-bit processor from the supported list, 4 GB of memory, 64 GB of storage, UEFI with Secure Boot capability, TPM 2.0, and a DirectX 12 capable GPU with a WDDM 2.0 driver.
TPM and Secure Boot are the two that catch people out, and both are frequently present but switched off in firmware. Check with Win + R → tpm.msc, and use PC Health Check for the full assessment.
9. Use a different upgrade route
If the tool will not cooperate, avoid it:
- Download the Windows 11 Disk Image (ISO) directly from Microsoft’s download page.
- Right-click the ISO and choose Mount.
- Run
setup.exefrom the mounted drive. - Choose to keep your files and applications.
This performs an in-place upgrade without the Installation Assistant, which sidesteps the TLS handshake that was failing. It is the most reliable route on a stubborn machine.
10. Check disk space and connection
Two mundane blockers worth confirming before you start over:
- Disk space. An in-place upgrade wants at least 20 GB free on the system drive; 30 GB is more comfortable.
- Connection stability. The download is several gigabytes. A connection that drops mid-transfer produces a confusing spread of error codes. Use a wired connection if one is available.
Frequently asked questions
What does 0x80072F8F mean?
It is WININET_E_SECURE_FAILURE: a secure connection could not be established. The usual causes are an incorrect system clock, a disabled TLS version, or something intercepting HTTPS traffic.
Why does the error mention two codes?
The second code identifies the phase. 0x20000 means the failure occurred while the tool was setting itself up, before any Windows files were touched — so nothing on your system was changed.
Does this affect Windows 7?
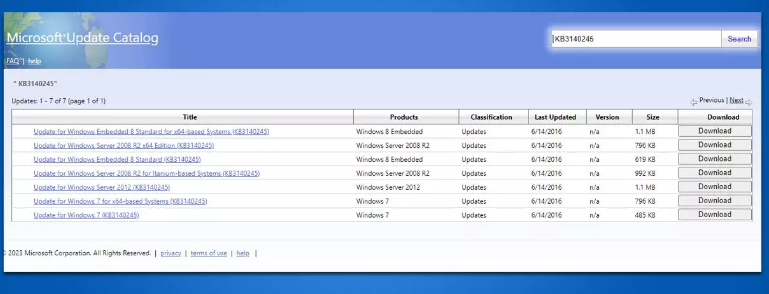
It did, historically — the same TLS problem stopped Windows 7 activating and upgrading, and Microsoft published a specific update to enable TLS 1.2 on it. Windows 7 has been out of support since January 2020, and Extended Security Updates for it ended in January 2023, so a Windows 7 machine should be replaced or reinstalled rather than repaired.
I fixed the clock and it still fails.
Work down in order: run the tool as administrator, enable TLS 1.2 in Internet Options, then set the registry value, then reset the update components. If it still fails, use the mounted ISO route — it avoids the failing component altogether.
Is it safe to enable TLS 1.0 and 1.1?
They are deprecated, and modern services will not negotiate them anyway. The 0xAA0 value above includes them for compatibility with older tools; if you would rather not, use 0xA00 for TLS 1.1 and 1.2 only, or 0x800 for TLS 1.2 alone.