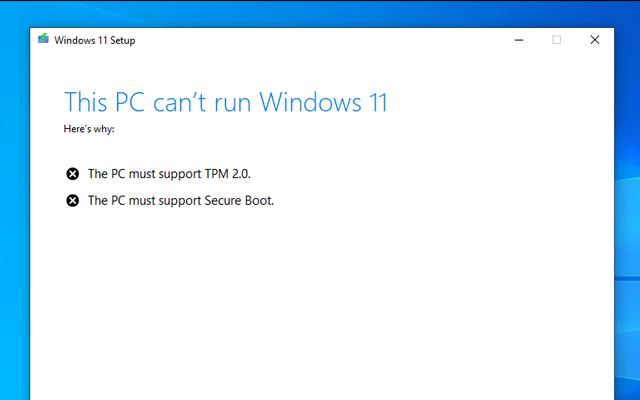
“This PC can’t run Windows 11” almost always comes down to one of three things: TPM 2.0, Secure Boot, or an unsupported processor. The first two are usually present but switched off in firmware, which means they are a settings change rather than a hardware limit.
Find out which one applies before doing anything else.
Checked August 2026. This matters more than it used to: Windows 10 left support on 14 October 2025, and consumer Extended Security Updates end on 12 October 2027. A machine that cannot move to Windows 11 needs a decision soon.
Find out which requirement fails
Download PC Health Check from Microsoft and run it. It names the specific requirement rather than making you guess.
The requirements are:
| Requirement | Usual outcome |
|---|---|
| TPM 2.0 | Present but disabled — fixable |
| Secure Boot capable | Present but disabled, or disk is MBR — fixable |
| UEFI firmware | Usually fine on anything from 2015 onward |
| Supported CPU | Roughly Intel 8th gen / AMD Ryzen 2000 and newer — not fixable |
| 4 GB RAM, 64 GB storage | Upgradeable on most desktops and many laptops |
| DirectX 12 / WDDM 2.0 graphics | Rarely the blocker |
Fix 1: Enable TPM 2.0
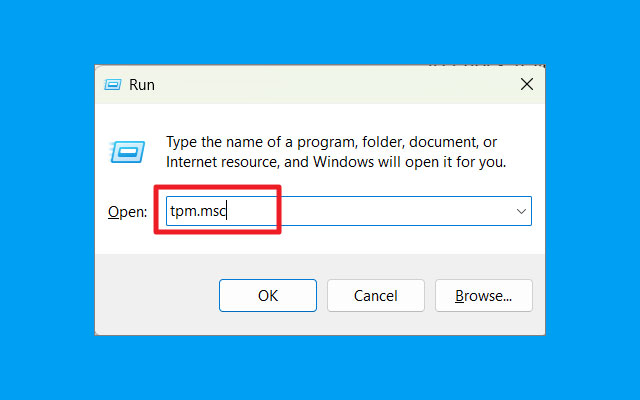
First check what you have:
- Press Win + R, type
tpm.msc, press Enter.
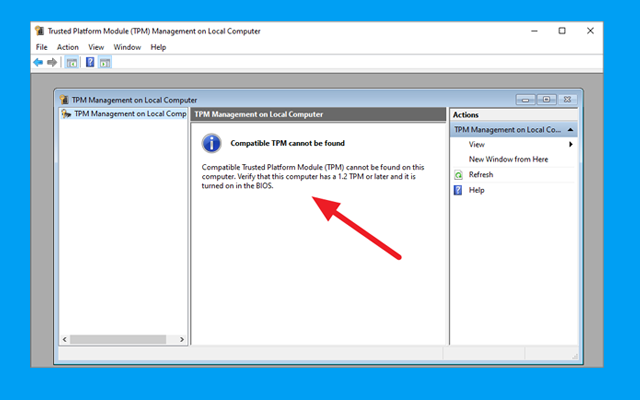
“Compatible TPM cannot be found” usually means it is disabled in firmware, not absent. Most CPUs since about 2016 include one — Intel calls it PTT (Platform Trust Technology), AMD calls it fTPM.
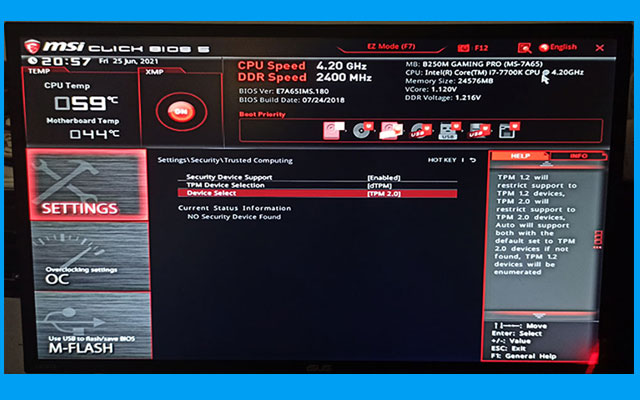
Turn it on
- Settings → System → Recovery → Restart now under Advanced startup.
- Troubleshoot → Advanced options → UEFI Firmware Settings → Restart.
- Look under Security or Advanced for:
- Intel: PTT, Intel Platform Trust Technology, or TPM Device Selection → Firmware TPM
- AMD: fTPM, AMD fTPM switch, or Security Device Support
- Enable it, save and exit.
If BitLocker is on, suspend it first. Changing TPM or Secure Boot settings alters the measurements BitLocker seals against, and the machine will ask for your 48-digit recovery key at the next boot. Suspend BitLocker before entering firmware, or have the key ready from account.microsoft.com/devices/recoverykey.
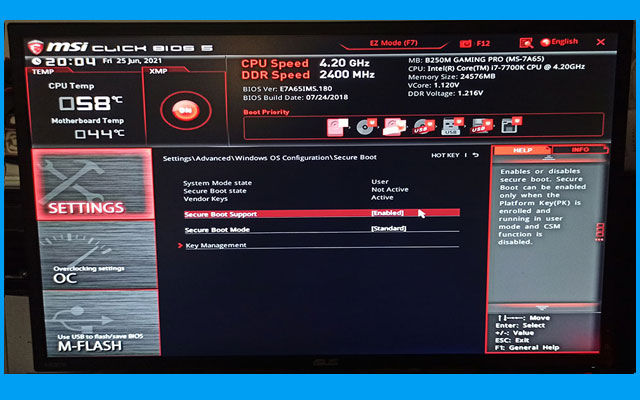
Fix 2: Enable Secure Boot
Check the current state: press Win + R, run msinfo32, and read Secure Boot State and BIOS Mode.
- BIOS Mode: UEFI and Secure Boot State: Off — just enable it in firmware, under Boot or Security.
- BIOS Mode: Legacy — the disk is partitioned as MBR and must be converted first. See below.
Converting MBR to GPT
Windows includes a tool that converts without reinstalling. Run from an elevated Command Prompt:
mbr2gpt /validate /disk:0 /allowFullOS
mbr2gpt /convert /disk:0 /allowFullOS
Then switch the firmware from Legacy/CSM to UEFI and enable Secure Boot.
Back up your data before converting. The tool is reliable, but a failure part-way through leaves a machine that will not boot. Run the /validate step first and do not proceed if it reports a problem.
Fix 3: The CPU is not supported
This is the one that cannot be worked around legitimately. Microsoft’s supported processor list starts at roughly Intel 8th generation and AMD Ryzen 2000.
If your CPU is older, the honest options are:
- Enrol in Extended Security Updates for Windows 10, which run to 12 October 2027. Free with Windows Backup sync, or a one-off fee.
- Replace the machine, or the motherboard and CPU on a desktop.
- Move to another operating system. A Linux distribution runs well on hardware Windows 11 rejects, and keeps receiving security updates.
About bypassing the check
Registry edits and modified installers that skip the requirement checks do exist. Be clear about what you are accepting:
- Microsoft states that unsupported installations are not entitled to updates, and may stop receiving them at any point.
- Some builds have already declined to install feature updates on unsupported hardware.
- A machine that stops receiving security updates is worse off than one still on supported Windows 10 with ESU.
It is your machine and your decision — but “it installed” is not the same as “it will keep being patched”.
Fix 4: Memory and storage
Both are usually solvable:
- 4 GB RAM minimum, though 8 GB is the realistic floor for comfortable use. Most desktops and many laptops accept more.
- 64 GB storage minimum, with 20–30 GB free for the upgrade itself. See how to free up space.
After enabling everything
- Boot back into Windows and run PC Health Check again.
- Check Settings → Windows Update — the Windows 11 offer usually appears within a day.
- To upgrade immediately, use the Windows 11 Installation Assistant, or mount the ISO and run
setup.exe.
If the upgrade itself then fails, see error 0x80072F8F – 0x20000.
Frequently asked questions
Why does Windows 11 need TPM at all?
It underpins BitLocker, Windows Hello and credential protection by storing keys in hardware that software cannot extract. The requirement is about raising the baseline, which is also why it is not optional.
My PC is only three years old and still fails.
Check PC Health Check for the specific reason. On a machine that recent it is nearly always TPM or Secure Boot disabled in firmware, not the CPU.
Will enabling TPM erase anything?
No, but if BitLocker is active you will be asked for the recovery key at the next boot. Suspend BitLocker first, or have the key to hand.
Is Windows 10 still safe to use?
It works, but it stopped receiving security updates on 14 October 2025 unless you enrolled in ESU — and consumer ESU ends 12 October 2027. After that, every new vulnerability stays unpatched.
Can I go back to Windows 10 after upgrading?
Yes, within ten days: Settings → System → Recovery → Go back. After that window, only a clean install.