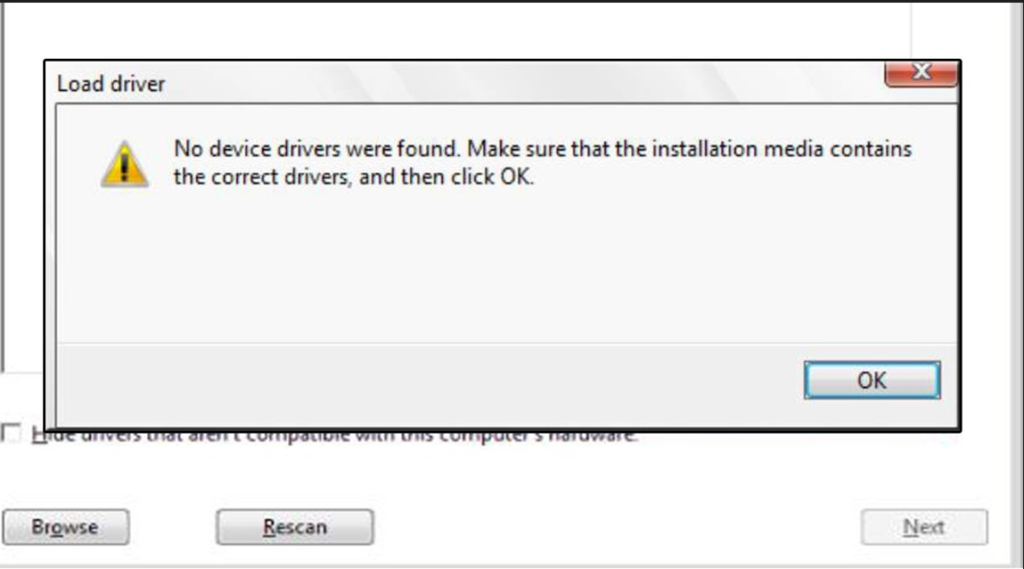
“No device drivers were found” during Windows setup almost never means you are missing a driver. In the overwhelming majority of cases it means setup lost contact with the USB stick it is running from — usually because it was plugged into a USB 3.0 port and the installer has no driver for that controller loaded yet.
The first thing to try takes ten seconds: move the USB stick to a different port and click Back, then Next.
Checked August 2026. Applies to installing Windows 11 and Windows 10.
1. Change the USB port
The single most effective fix, and it costs nothing.
- Move the stick to a USB 2.0 port if the machine has one — usually black rather than blue.
- On a desktop, use a port directly on the motherboard’s rear panel, not a front-panel header and not a hub.
- Then click Back in setup and Next again, rather than restarting.
Why it works: setup starts before all storage and controller drivers are loaded. When it transitions between phases it re-enumerates devices, and if the installation media is on a controller it cannot yet see, the source disappears mid-install.
2. Switch the SATA mode in firmware
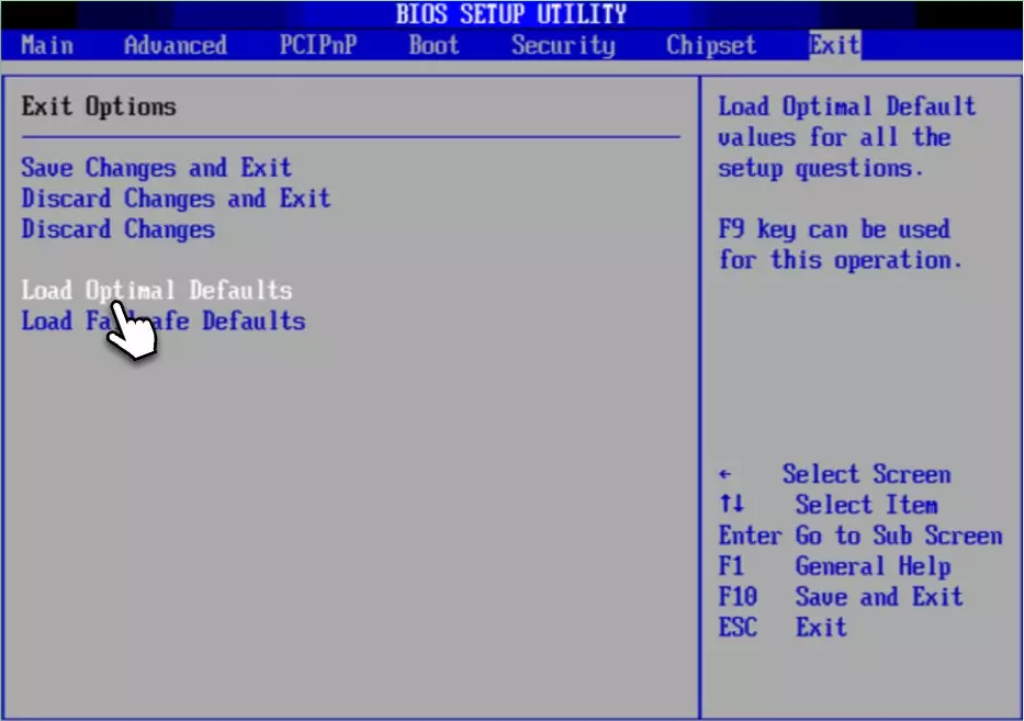
The second most common cause. If the storage controller is set to RAID or Intel RST mode, a standard installer has no driver for it and sees no disk.
- Enter the firmware setup — usually Del, F2 or F10 at power-on.
- Find SATA Mode, SATA Operation or Storage Configuration.
- Change RAID or RST Premium to AHCI.
- Save and exit.
Only change this on a clean install. Switching an existing Windows installation from RAID to AHCI will stop it booting, because it has no AHCI driver loaded at startup. If you need to change it on a working system, there is a supported procedure involving Safe Mode — do that rather than flipping the setting.
The alternative, if you need RAID mode, is to load the Intel RST driver during setup: download it on another machine, put it on a second USB stick, and use the Load driver button on the error screen.
3. Rebuild the installation media
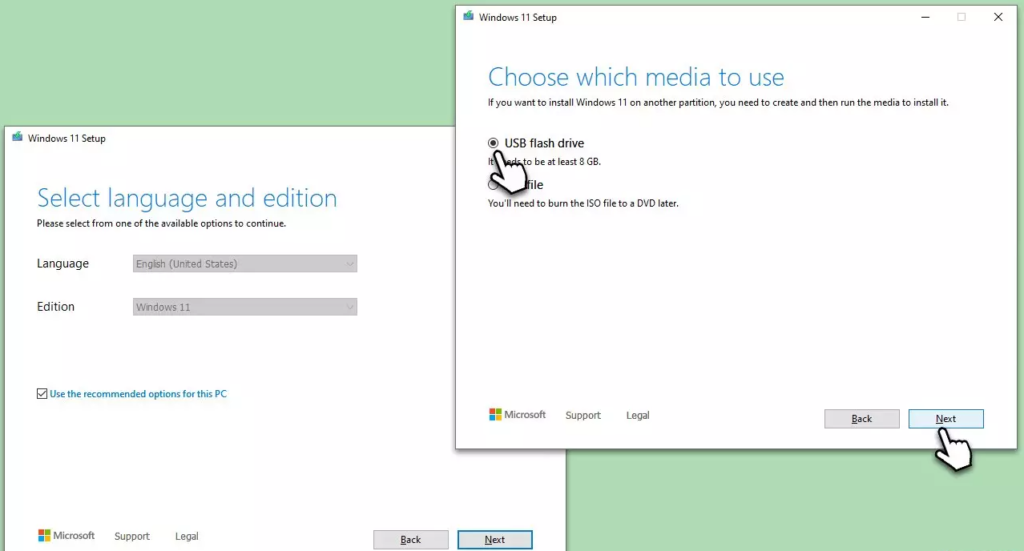
Faulty media is the third common cause. Rebuild it properly:
- Download the current ISO or the Media Creation Tool from Microsoft’s download page — not from a mirror.
- Use a different USB stick if you have one. Sticks fail silently, and an old one that “worked last time” is a real suspect.
- Write it with the Media Creation Tool, or with Rufus set to GPT partition scheme and UEFI target for a modern machine.
The 4 GB file problem
If you are copying ISO contents to a FAT32 stick by hand, install.wim now exceeds 4 GB and FAT32 cannot store a file that large. The copy silently omits it, and setup fails. Use the Media Creation Tool or Rufus, both of which split the file automatically.
4. Check the drive is detected at all

Enter the firmware setup and look at the storage list. If your SSD or hard disk is not there, the problem is physical:
- Reseat the M.2 drive or the SATA data and power cables.
- On some motherboards, using an M.2 slot disables specific SATA ports. Check the manual.
- Try the drive in a different slot or on a different cable.
5. Wipe the disk from setup
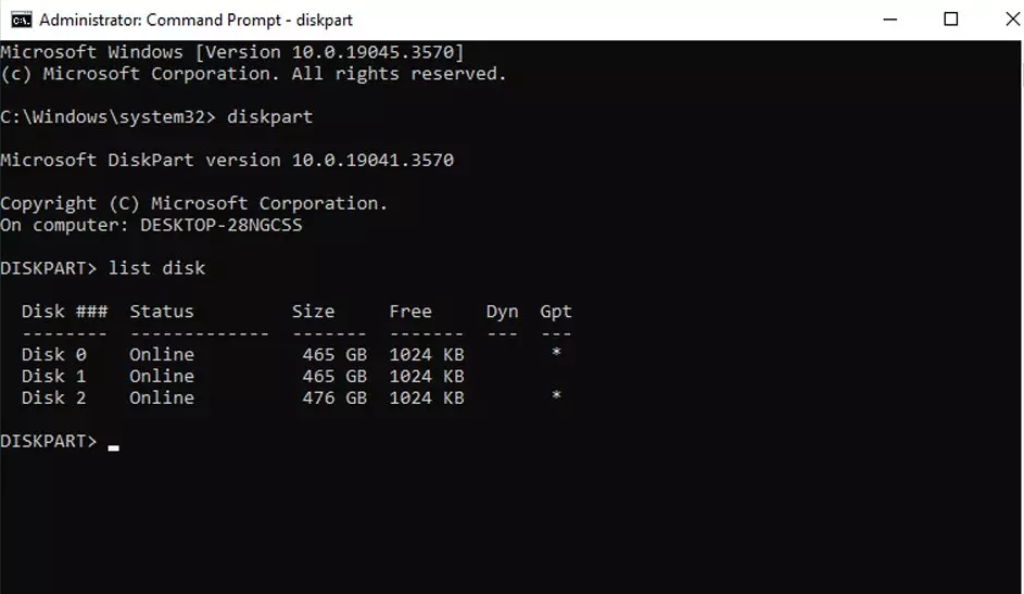
A leftover partition scheme — particularly MBR on a machine booting in UEFI mode — can cause it.
This erases the entire drive. Everything on it is gone, with no recovery. Only do this on a disk whose contents you are certain you do not need, and confirm the disk number twice.
- At the setup screen, press Shift + F10 to open a Command Prompt.
- Run these, one line at a time:
diskpart
list disk
select disk 0
clean
convert gpt
exit
exit
list disk first, and check the size to be sure disk 0 is the one you mean — the USB stick is in that list too.
6. Load a driver manually
Genuinely necessary in a minority of cases: some Intel VMD-enabled laptops and some RAID configurations.
- On another machine, download the Intel RST or VMD driver from the laptop manufacturer’s support page for your exact model.
- Extract it to a second USB stick.
- At the error screen, choose Load driver → Browse → the folder containing the
.inffile.
Take the driver from the machine’s own manufacturer, not the generic Intel package — vendor builds are matched to the specific controller configuration.
In order, what to try
- Move the USB stick to a USB 2.0 port, click Back then Next.
- Set SATA mode to AHCI in firmware.
- Rebuild the USB stick with the Media Creation Tool, on a different stick.
- Confirm the drive appears in firmware.
- Clean the disk with diskpart, if you can afford to lose it.
- Load the vendor’s storage driver.
Frequently asked questions
Do I actually need to find a driver?
Usually not. The message is misleading — the port, the media or the SATA mode is the cause far more often than a genuinely missing driver.
Why does moving the USB stick help?
Setup re-enumerates devices between phases. If the media sits on a controller it cannot yet see, the installation source vanishes and setup reports missing drivers.
Is it safe to switch from RAID to AHCI?
On a clean install, yes. On an existing Windows installation it will stop the machine booting unless you prepare Windows for the change first.
Can a failing USB stick cause this?
Yes, and it is common. Sticks degrade, and a partially corrupt write produces exactly this error. Test with a different stick before assuming anything about the PC.
I get this on a laptop with no USB 2.0 ports.
Try each USB port in turn — controllers differ even between ports of the same type. Then rebuild the media with Rufus, and load the vendor’s Intel RST or VMD driver if the laptop uses one.